End-to-End Tutorial: Network Setup & VM Deployment
This tutorial walks you through the complete workflow of provisioning a virtual machine on Octos Cloud. By the end, you will have a running instance connected to a private network, protected by firewall rules, and reachable over a public IP address.
Estimated time: 15–20 minutes
What you'll set up
| Resource | Purpose |
|---|---|
| Project | Organizational container for all your cloud resources |
| Virtual Network | Private, isolated Layer 2 network for your instances |
| Subnet | IP address range within your Virtual Network |
| Virtual Router | Gateway that connects your private subnet to the internet |
| Security Group Rules | Firewall rules controlling inbound and outbound traffic |
| Instance (VM) | Your virtual machine running on dedicated compute |
| Floating IP | Public IP address attached to your instance |
Quick navigation
- Step 1: Create a Project
- Step 2: Create a Virtual Network
- Step 3: Create a Subnet
- Step 4: Create a Virtual Router
- Step 5: Attach the Network to the Router
- Step 6: Configure Security Group Rules
- Step 7: Create an Instance
- Step 8: Attach a Floating IP
Step 1: Create a Project
Projects are the top-level organizational unit on Octos Cloud. Every resource — networks, instances, volumes — belongs to a project. Creating a dedicated project keeps your infrastructure tidy and simplifies billing and access control.
1.1 Open the Dashboard and start a new project
From the Dashboard, you will see your existing projects listed as cards. Click the + Create New Project card on the right.

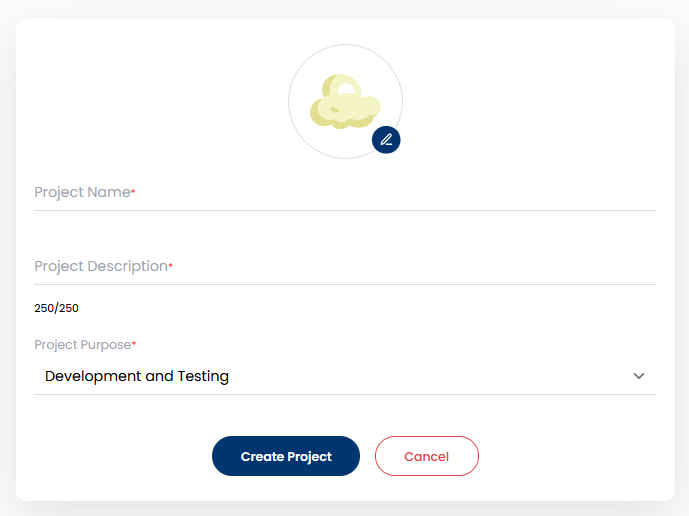
1.2 Fill in the project details
A form will appear. Fill in the following fields:
| Field | Description |
|---|---|
| Project Name | A unique name to identify this project |
| Project Description | A brief description of what this project is for |
| Project Purpose | Select the intended use from the dropdown (e.g., Development and Testing) |
Click Create Project when done.
Step 2: Create a Virtual Network
A Virtual Network (VNet) provides a private, isolated Layer 2 network segment. Instances attached to the same Virtual Network can communicate with each other directly. You must create a Virtual Network before you can create subnets or attach instances.
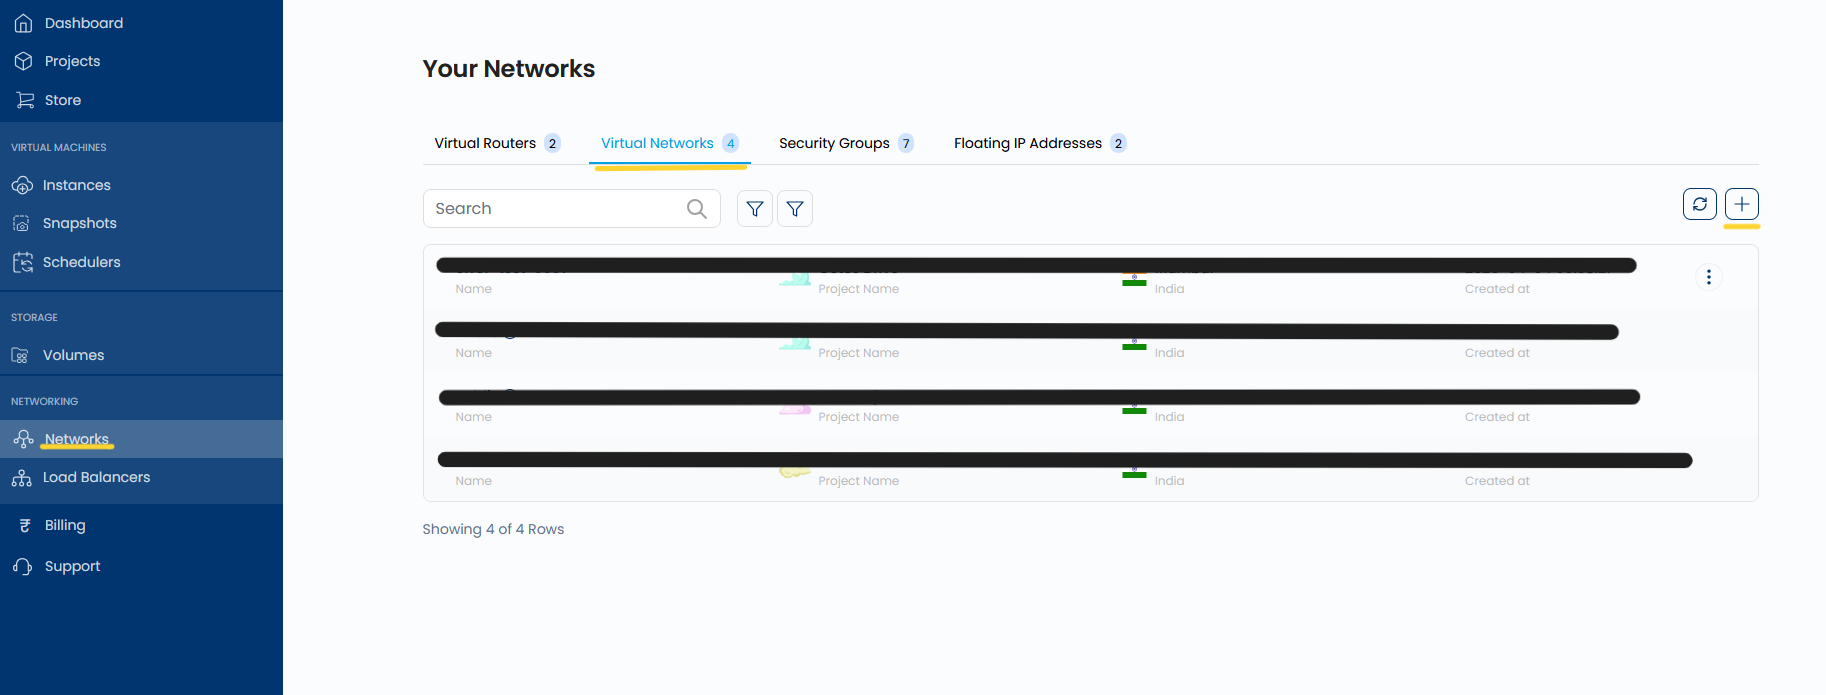
2.1 Navigate to Networks and open the Virtual Networks tab
In the left sidebar, click Networks under the NETWORKING section. You will land on the Your Networks page. Click the Virtual Networks tab to view your existing networks.
Click the + button in the top-right corner to create a new Virtual Network.
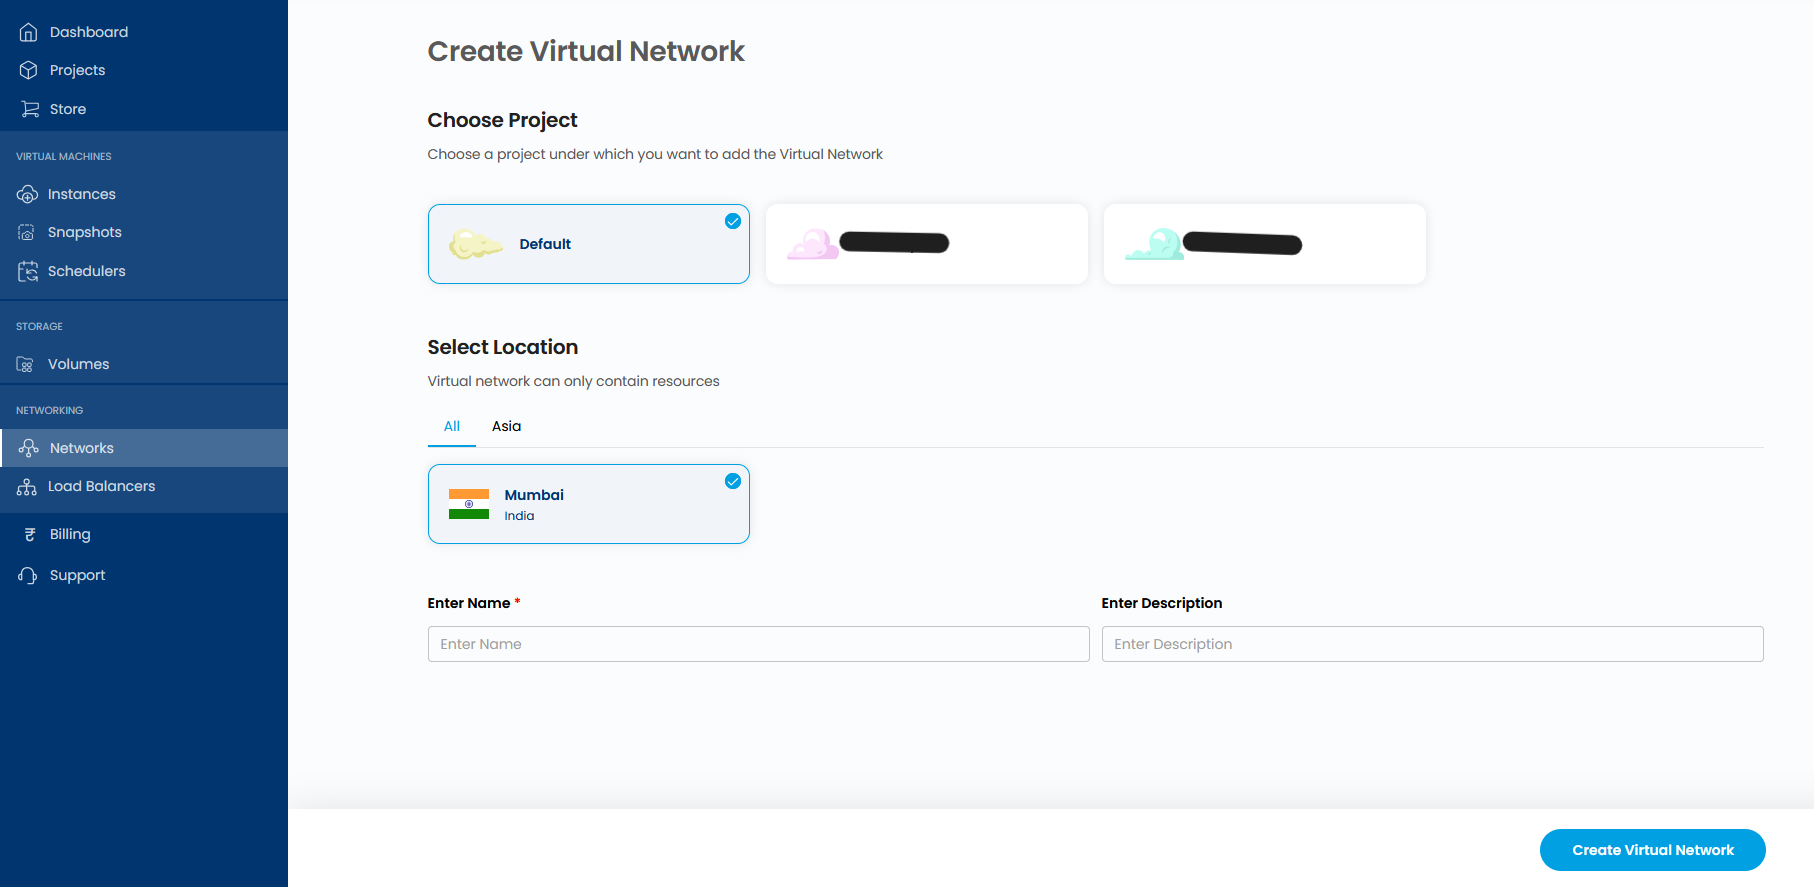
2.2 Configure and create the Virtual Network
The Create Virtual Network form opens. Complete the following:
- Choose Project — Select the project you just created.
- Select Location — Choose the data center region where this network will exist (e.g., Mumbai, India).
- Enter Name — Give the network a descriptive name (e.g.,
your-network-name). - Enter Description (optional) — A short note about this network's purpose.
Click Create Virtual Network at the bottom of the page.
Step 3: Create a Subnet
A Subnet defines the IP address range within your Virtual Network. Instances and routers connect to subnets — not directly to the network itself. You must configure at least one subnet before attaching a router or launching a VM.
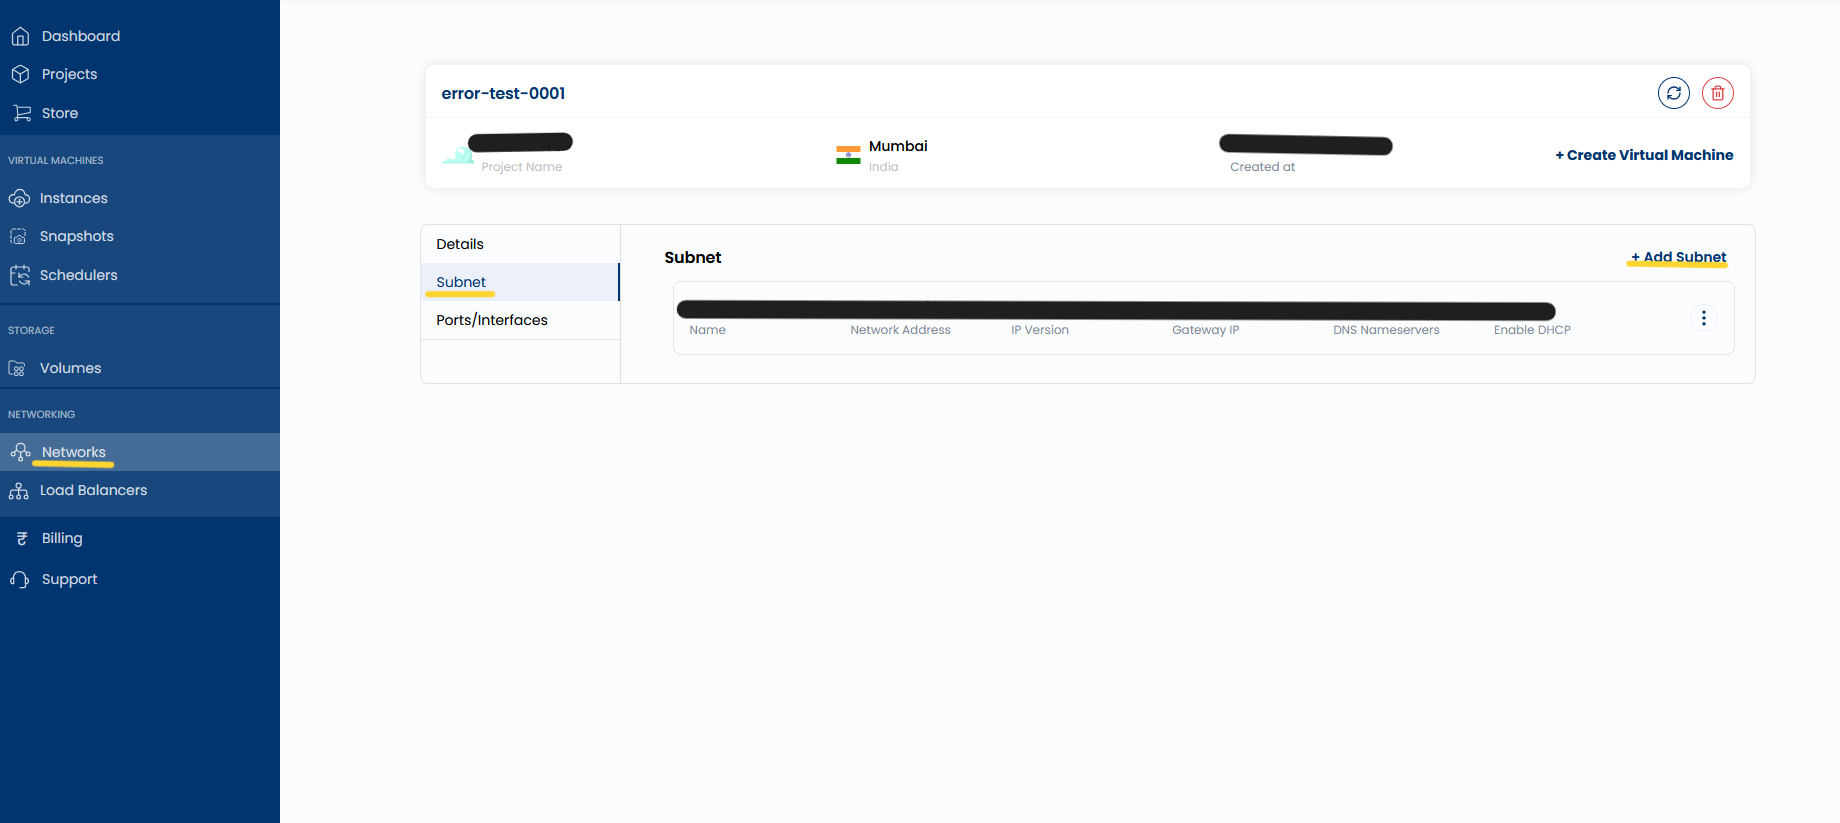
3.1 Open the network detail and navigate to the Subnet tab
Click into the Virtual Network you just created from the list. In the network detail view, click the Subnet tab in the left panel.
Click + Add Subnet in the top-right of the Subnet section.
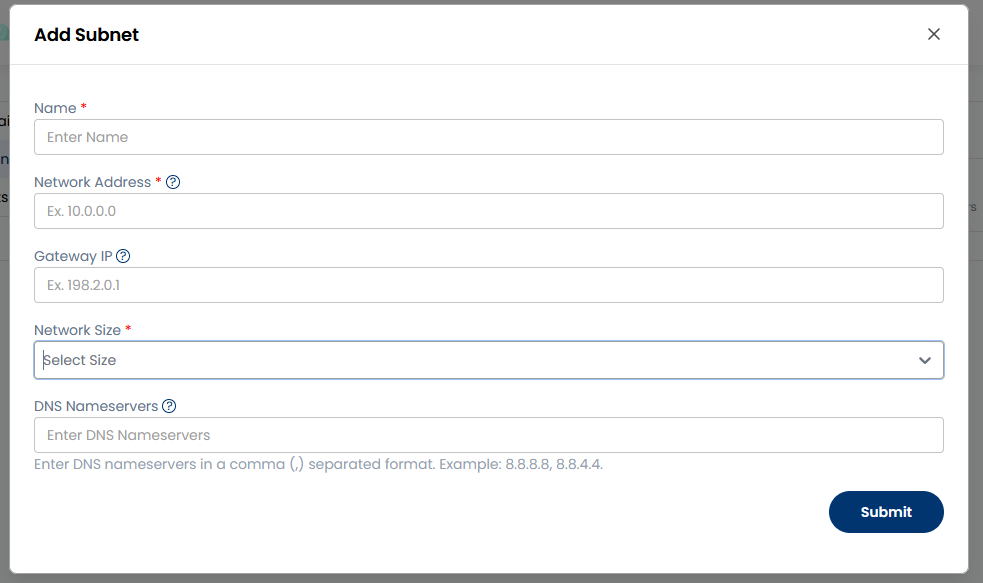
3.2 Fill in the subnet details
The Add Subnet modal will appear. Fill in the required fields:
| Field | Description |
|---|---|
| Name | A name for this subnet (e.g., your-subnet-name) |
| Network Address | The base IP of your subnet (e.g., 10.0.0.0) |
| Network Size | The CIDR prefix length — select from the dropdown (e.g., /24 for 256 addresses) |
| DNS Nameservers | Comma-separated DNS servers (e.g., 8.8.8.8, 1.1.1.1) |
| Gateway IP (optional) | The router's IP within this subnet; auto-assigned if left blank |
Click Submit.
The Network Size dropdown controls the CIDR block — a /24 subnet provides 256 addresses (x.x.x.0 through x.x.x.255), which is sufficient for most workloads. Smaller prefixes like /28 give 16 addresses; larger ones like /16 give 65,536.
Step 4: Create a Virtual Router
A Virtual Router acts as the gateway between your private subnet and the internet. Without a router, instances on a private network have no outbound internet access and cannot have Floating IPs attached. Create the router before attaching your subnet to it.
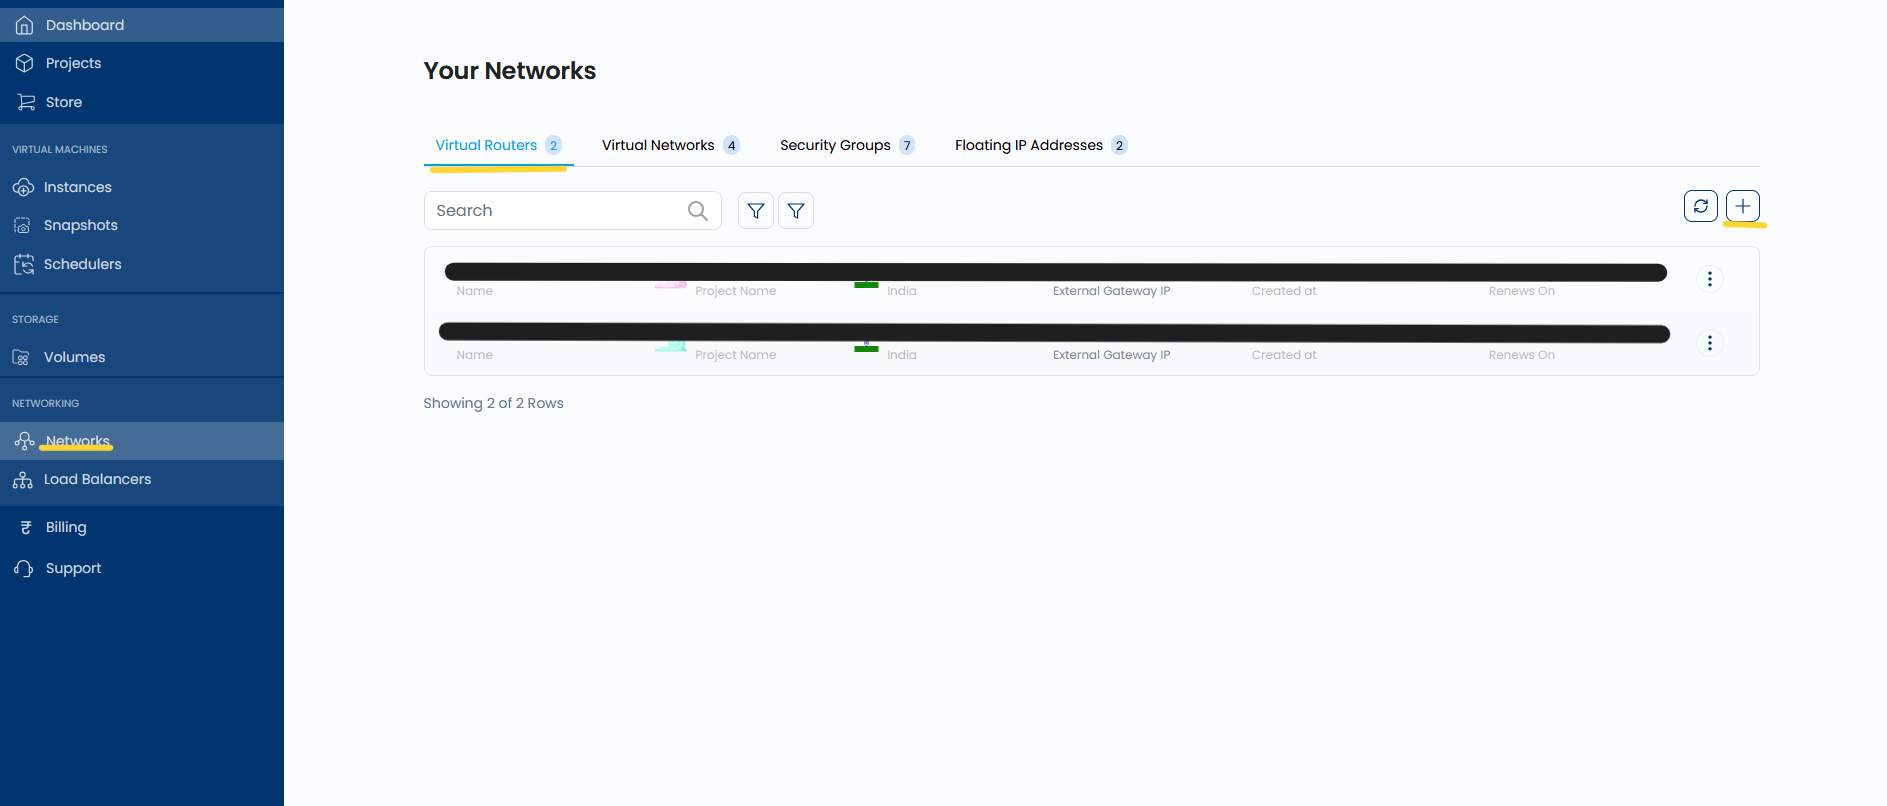
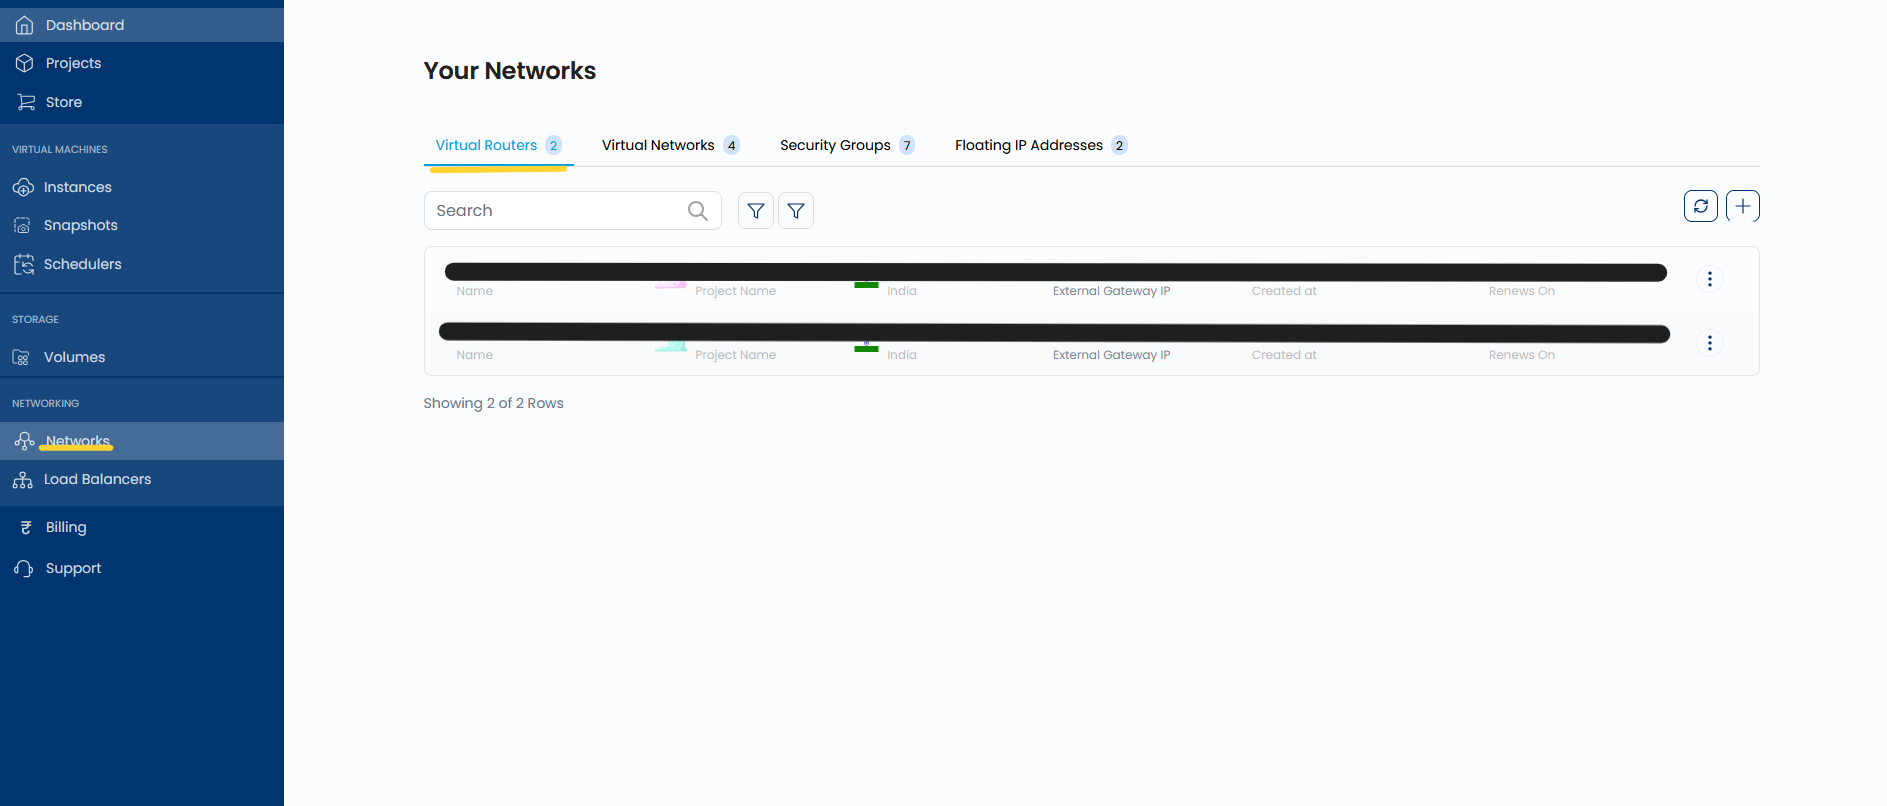
4.1 Navigate to the Virtual Routers tab and click +
On the Your Networks page, click the Virtual Routers tab. Click the + button in the top-right corner.
4.2 Configure and create the Virtual Router
The Create Virtual Router form opens:
- Choose Project — Select your project.
- Select Location — Choose the same region as your Virtual Network (e.g., Mumbai, India).
- Enter Name — Give the router a descriptive name (e.g.,
your-router-name). - Enter Description (optional).
Scroll to the bottom of the page and click Create Virtual Router.

Step 5: Attach the Network to the Router
Creating a router and creating a subnet are independent actions. You must explicitly attach your subnet to the router to establish the routing path. Once attached, instances on that subnet can route traffic through the router to reach the internet.
5.1 Open the router detail page
From the Virtual Routers list, click on the row of the router you just created to open its detail page.
5.2 Navigate to the Networks tab and attach a network
On the router detail page, click the Networks tab in the left panel. The Attached Networks section will appear on the right. Click + Attached Networks.
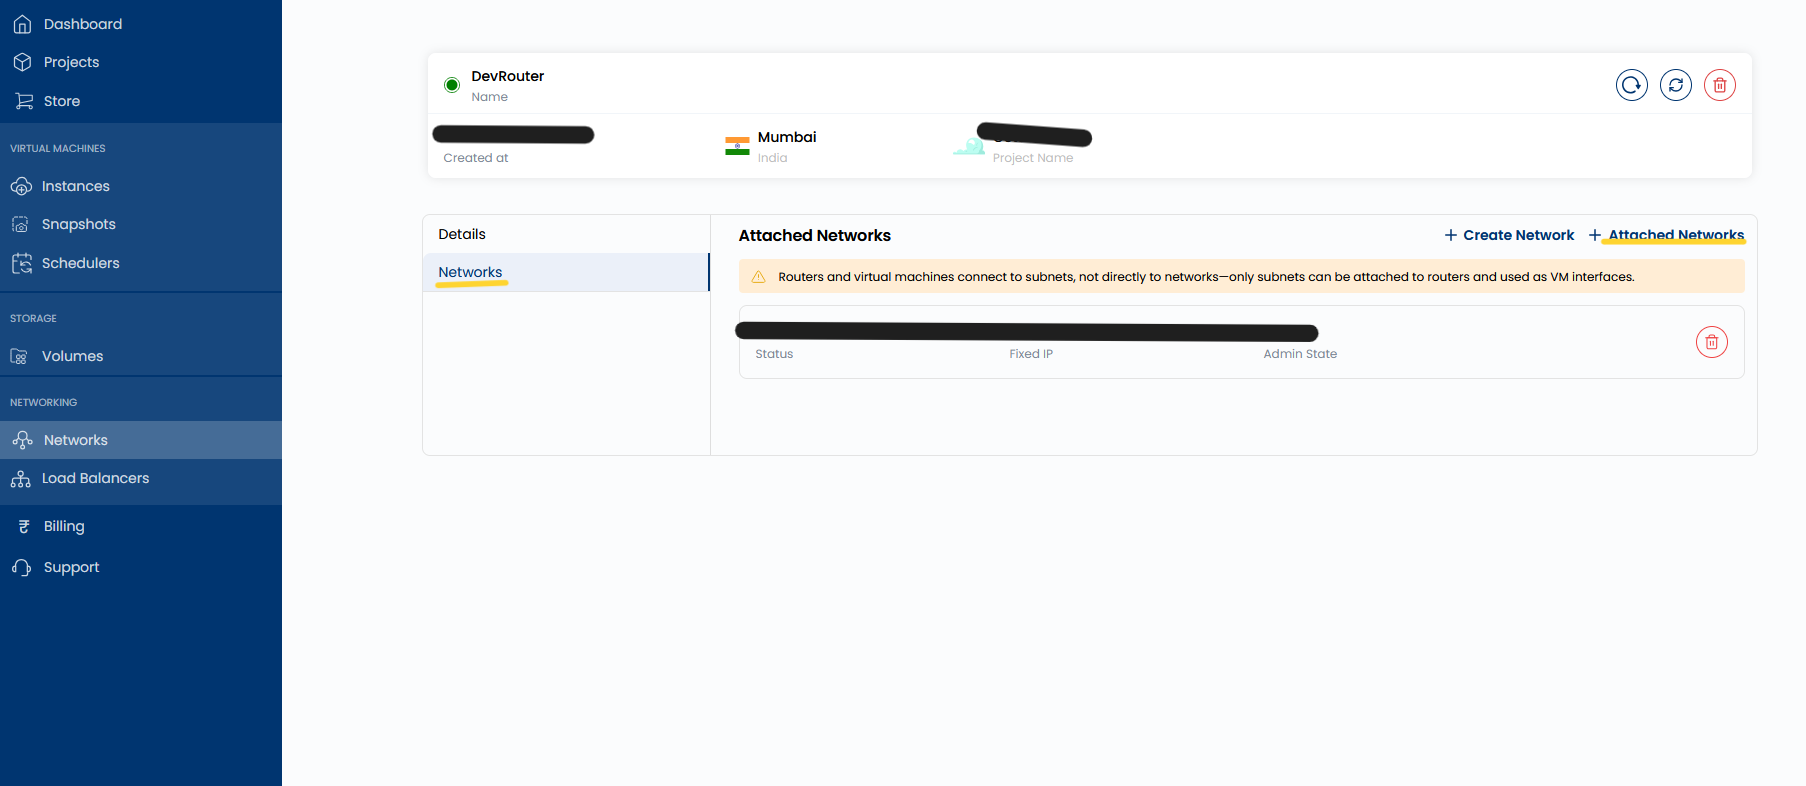
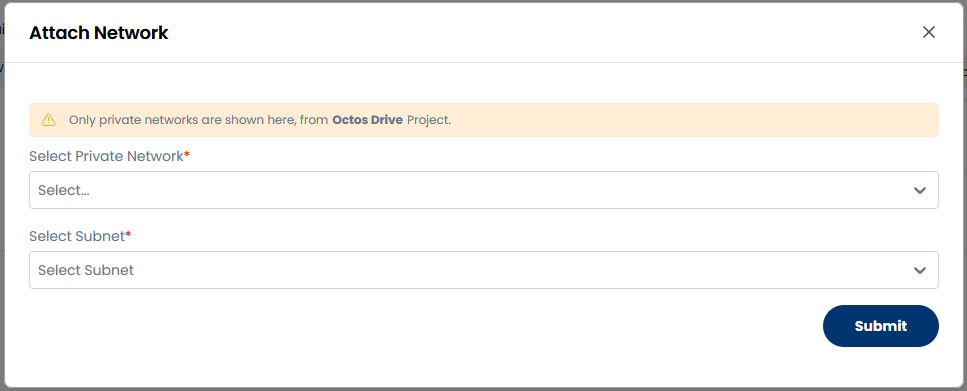
The portal displays a reminder on this screen: "Routers and virtual machines connect to subnets, not directly to networks — only subnets can be attached to routers and used as VM interfaces." Make sure you select both the network and the correct subnet in the next step.
5.3 Select the network and subnet to attach
The Attach Network modal opens:
- Select Private Network — Choose the Virtual Network you created in Step 2.
- Select Subnet — Choose the subnet you created in Step 3.
Click Submit.
Step 6: Configure Security Group Rules
Security Groups are virtual firewalls. They define which traffic is allowed to reach your instances. Before creating an instance, configure a Security Group with the ports your instance needs — otherwise all inbound connections will be blocked by default.
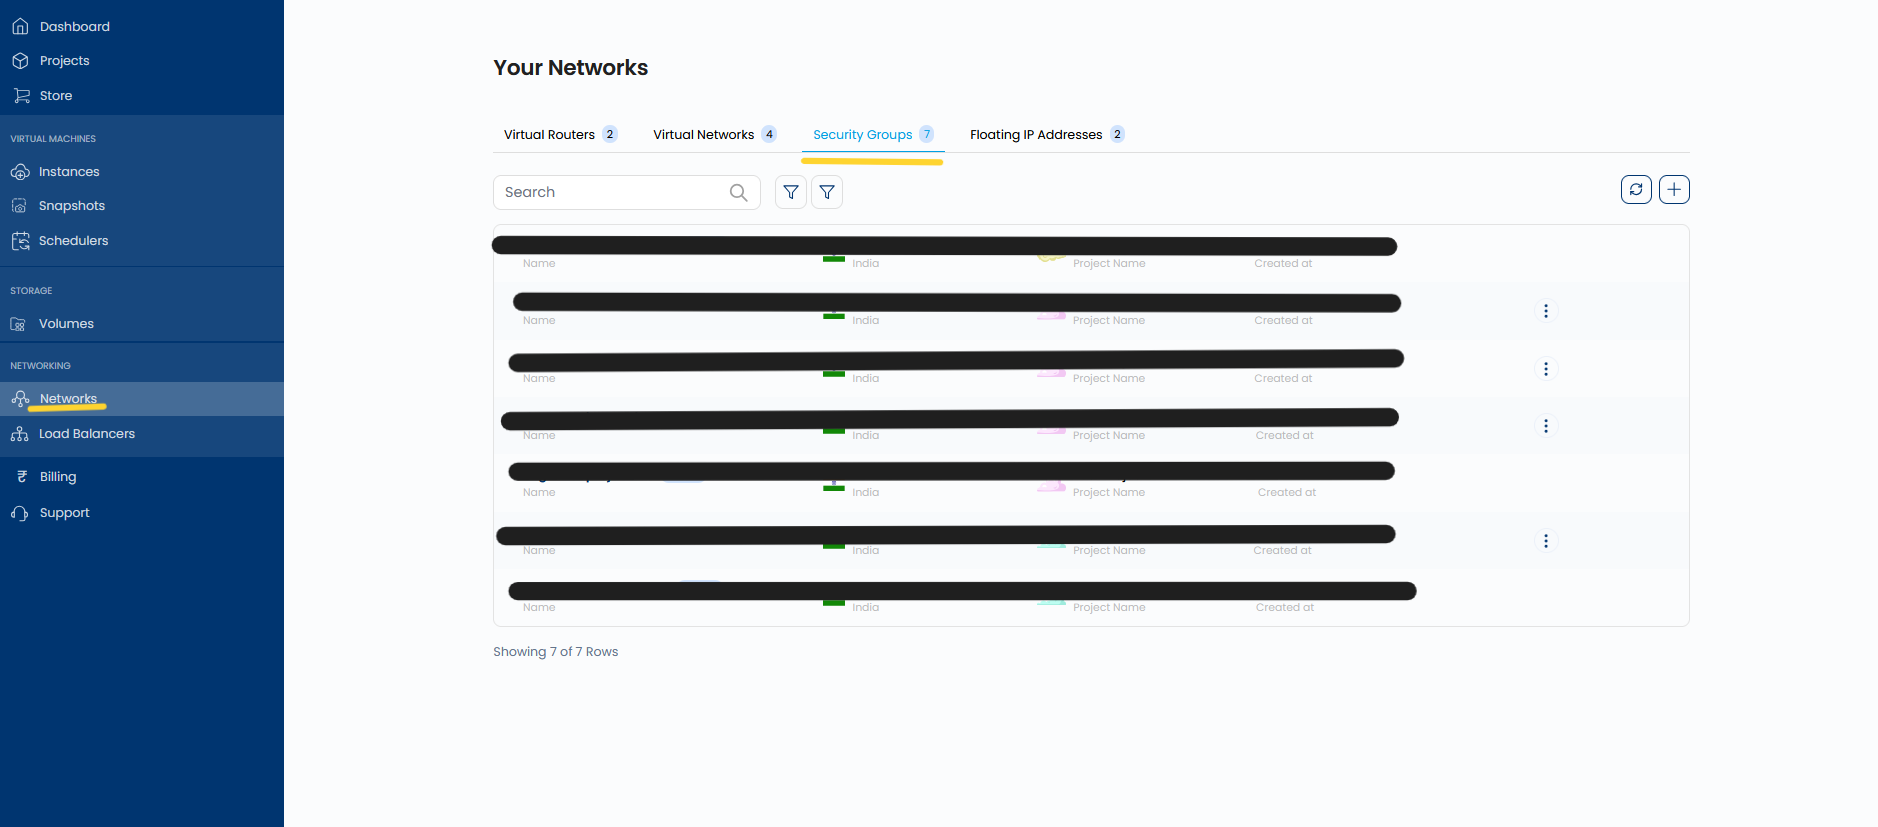
6.1 Navigate to the Security Groups tab
On the Your Networks page, click the Security Groups tab. You will see a list of existing Security Groups. Click into the group you want to configure, or create a new one using the + button.
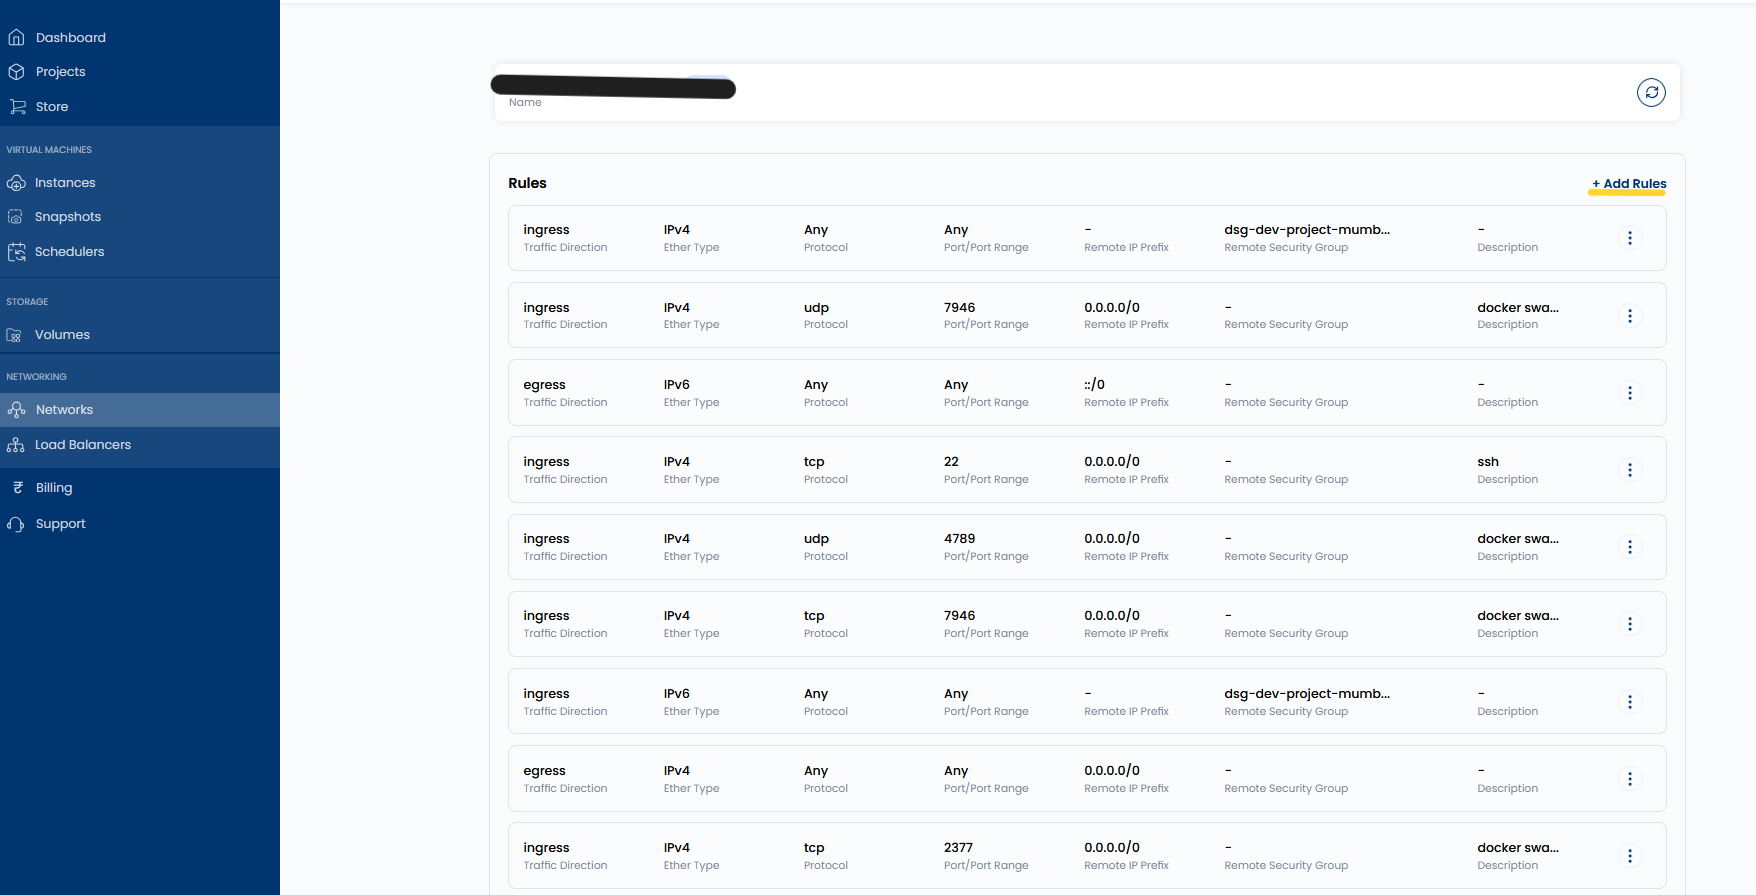
6.2 Open the Rules view and add a rule
Inside the Security Group detail page, the Rules section lists all current firewall rules. Click + Add Rules to add a new rule.
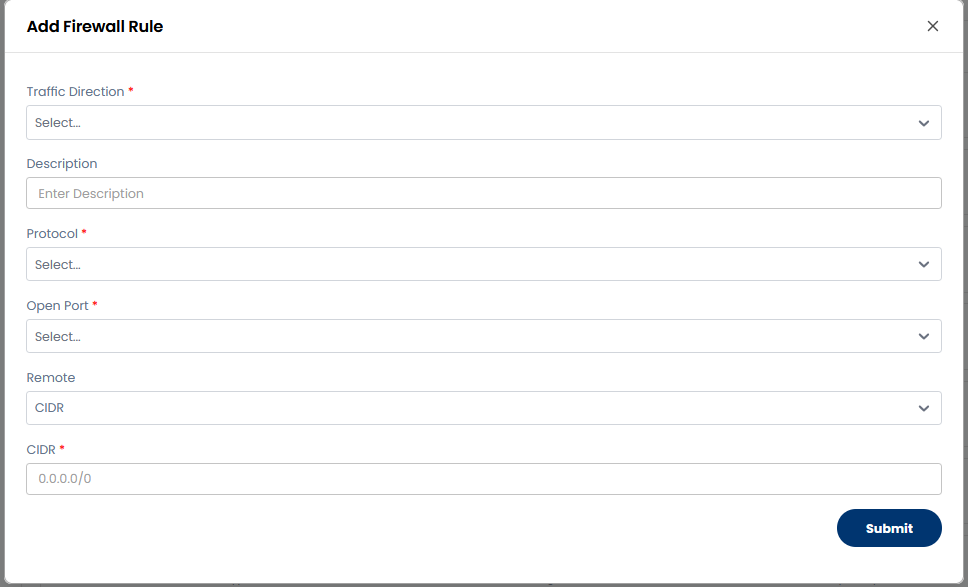
6.3 Fill in the Add Firewall Rule form
The Add Firewall Rule modal appears for each rule you add:
| Field | Description |
|---|---|
| Traffic Direction | ingress (inbound to instance) or egress (outbound from instance) |
| Protocol | tcp, udp, icmp, or any |
| Open Port | The port number or range to allow |
| Remote | Set to CIDR to restrict by IP range |
| CIDR | The source IP range — 0.0.0.0/0 allows all IPs |
| Description (optional) | A label for this rule (e.g., ssh, http) |
Click Submit after each rule. Repeat this process for every port you need to open (e.g., SSH on port 22, HTTP on port 80, HTTPS on port 443, and ICMP for ping).
For production workloads, restrict SSH access (port 22) to your specific office or VPN IP range instead of 0.0.0.0/0. This significantly reduces the attack surface.
Step 7: Create an Instance
With your network, subnet, router, and security group configured, you are ready to launch a virtual machine. The instance creation wizard walks you through compute, image, storage, networking, and access configuration in a single flow.
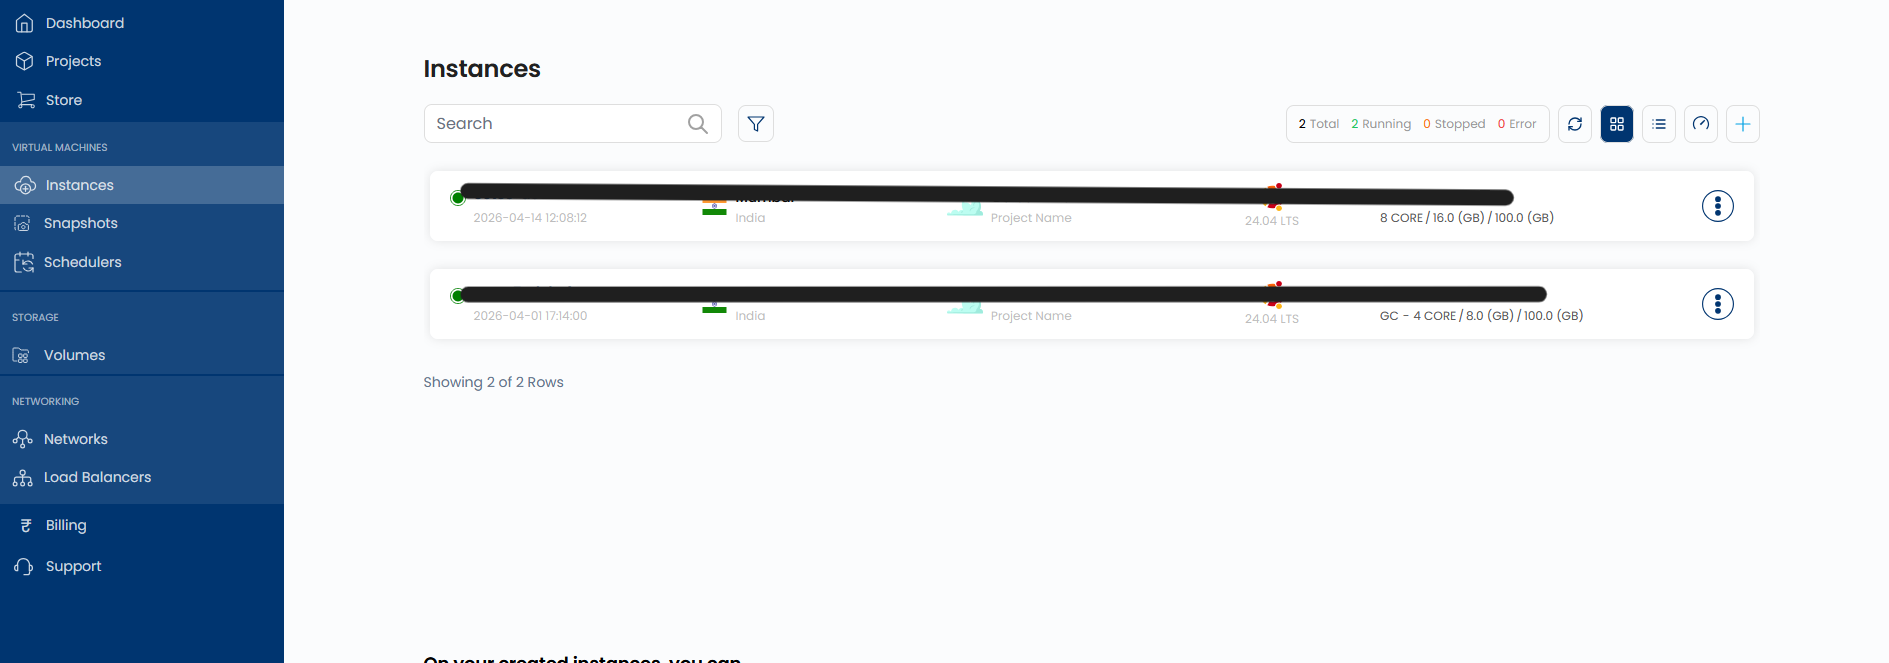
7.1 Open the Instances page and start creation
In the left sidebar, click Instances under VIRTUAL MACHINES. Click the + button in the top-right corner to open the instance creation wizard.
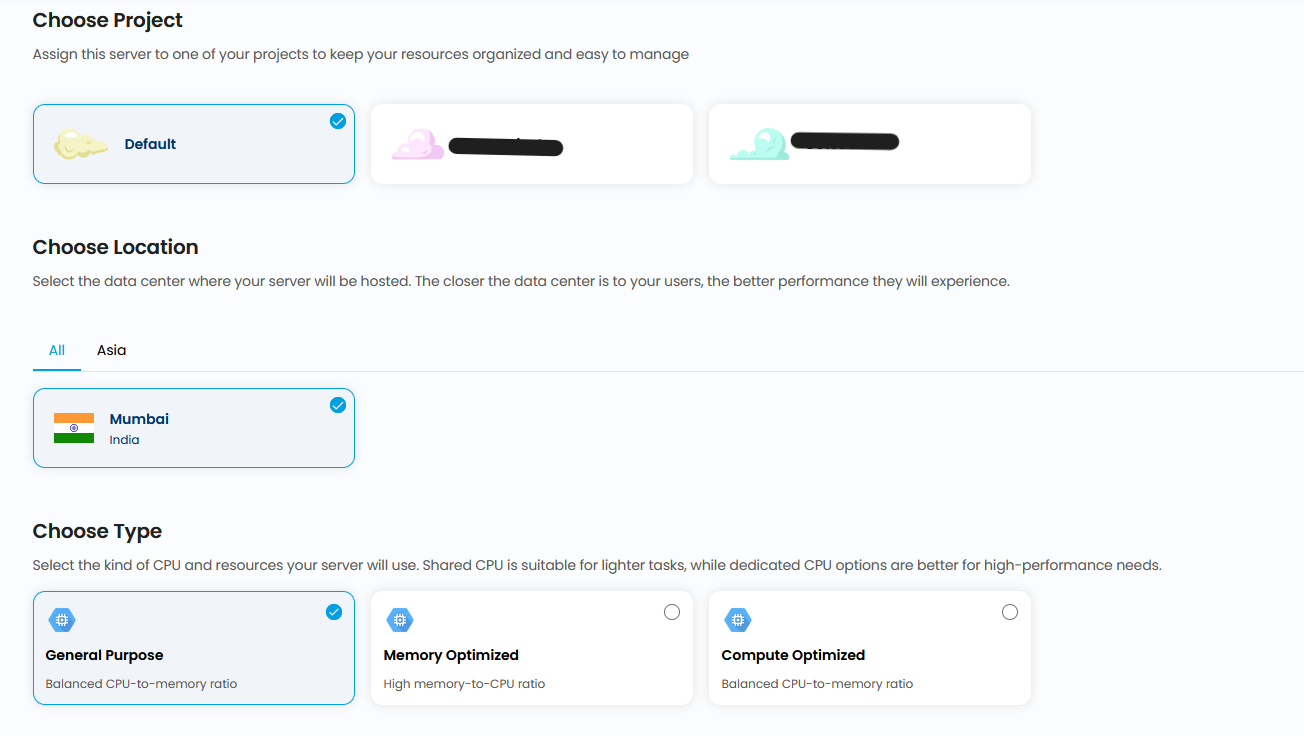
7.2 Choose your project, location, and compute type
The first section of the wizard asks you to configure:
- Choose Project — Select the project this instance belongs to.
- Choose Location — Select the data center region (must match your Virtual Network's region).
- Choose Type — Select the compute type: General Purpose, Memory Optimized, or Compute Optimized.
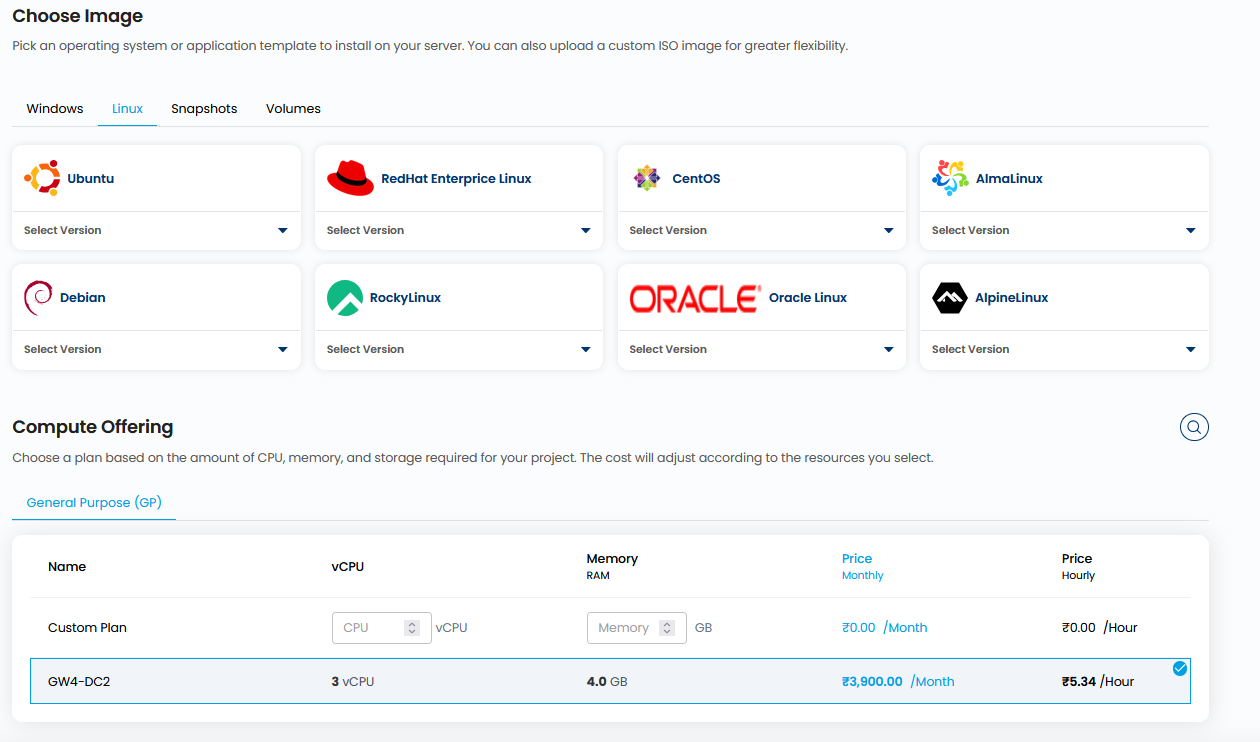
7.3 Choose an operating system image and compute plan
Scroll down to the next sections:
- Choose Image — Select an OS tab (e.g., Linux) then choose your distribution (Ubuntu, RedHat Enterprise Linux, CentOS, AlmaLinux, Debian, RockyLinux, Oracle Linux, AlpineLinux) and select a version from its dropdown.
- Compute Offering — Select a plan from the table based on your vCPU and memory needs. A Custom Plan option is available if you need a specific configuration.
7.4 Configure storage, network, and security group
Continue scrolling to:
- OS Disk Offering — Select the storage plan (NVMe) and size for your instance's boot disk. A Custom size option is available.
- Delete Volume on Instance Delete — Toggle this on if you want the boot disk automatically deleted when the instance is destroyed.
- Choose Network — Select the subnet you created in Step 3. Your subnet will appear in the table with its name, network name, and address.
- Choose Security Groups — Select the Security Group you configured in Step 6.

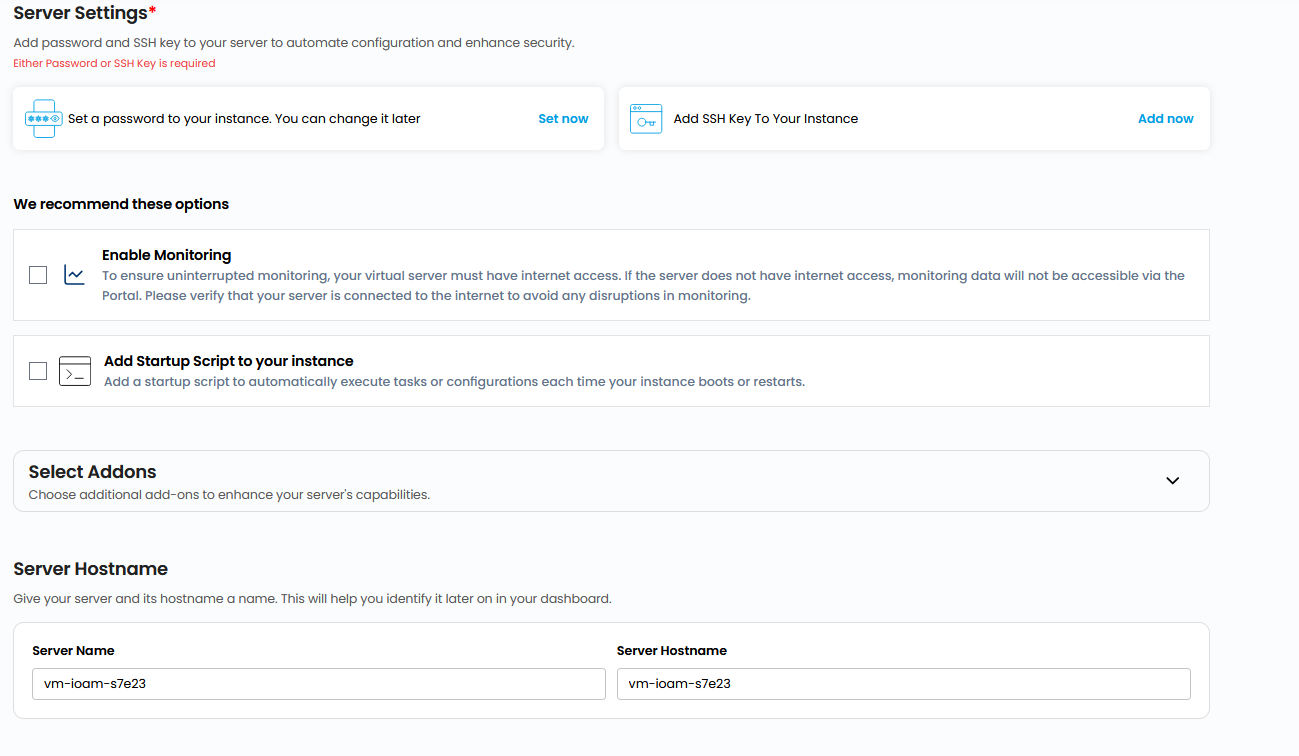
7.5 Set server access and hostname
The final section covers:
- Server Settings — You must configure at least one access method:
- Click Set now to set a root password, or
- Click Add now to attach an SSH key to the instance.
- Enable Monitoring (optional) — Check this to enable platform monitoring. Requires internet access from the instance.
- Add Startup Script (optional) — Attach a script to run automatically on first boot.
- Select Addons (optional) — Expand to view available add-ons.
- Server Hostname — Enter a Server Name for the instance. The hostname field auto-populates to match.
Review all settings, then scroll to the bottom and click Create Instance.
Instance provisioning typically completes within 30–90 seconds. The instance status will change to Running once it is ready.
Step 8: Attach a Floating IP
A Floating IP is a public IP address that makes your instance reachable from the internet. Without a Floating IP, your instance is only accessible within your private network. Attaching one is the final step to enable SSH access and serve public traffic.
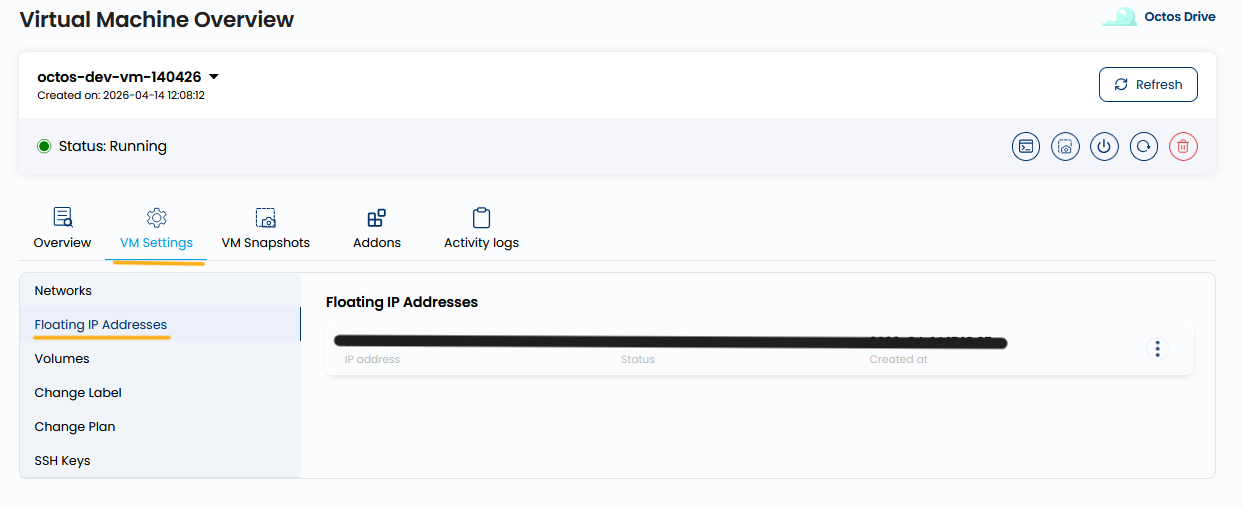
8.1 Open the instance and navigate to Floating IP Addresses
From the Instances list, click on the instance you just created to open the Virtual Machine Overview page.
Click the VM Settings tab in the top navigation. In the left sub-menu, click Floating IP Addresses.

8.2 View and manage your Floating IP
The Floating IP Addresses section shows any IP addresses currently associated with this instance. Use the ⋮ menu on the right of each row to manage the attachment.
What you've built
After completing all 8 steps, your infrastructure on Octos Cloud includes:
- ✅ A Project to organize your resources
- ✅ A Virtual Network with a configured Subnet
- ✅ A Virtual Router connecting your subnet to the internet
- ✅ Security Group Rules protecting your instance
- ✅ A running Virtual Machine on dedicated compute
- ✅ A Floating IP for public internet access